Beam Profile Corrector
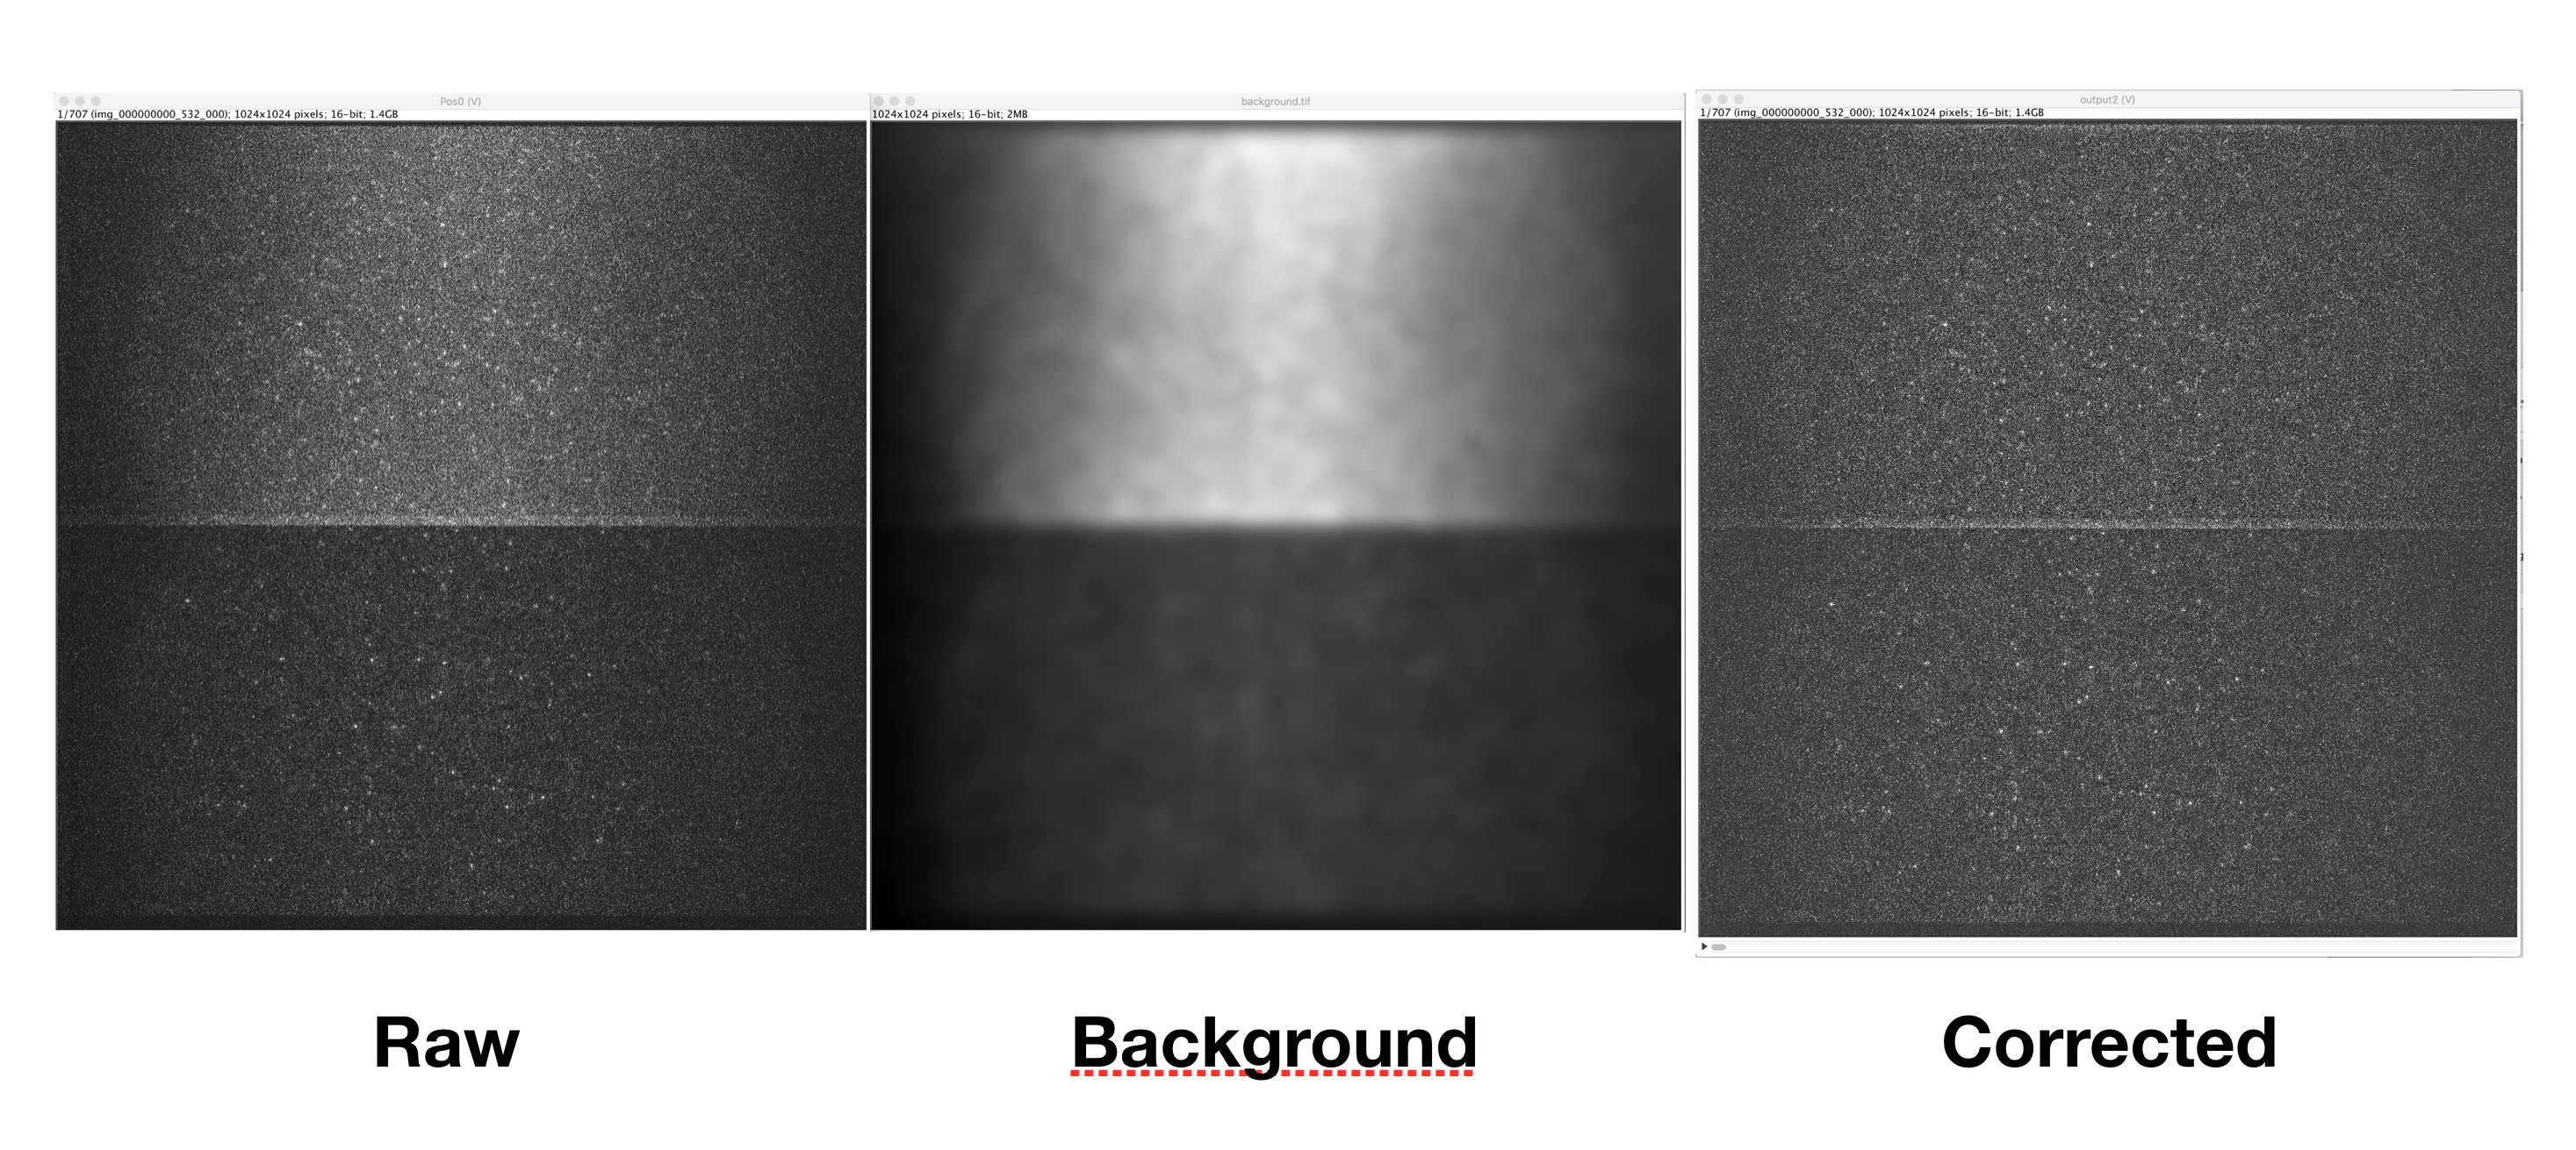
This command corrects for the beam profile in images collected on the fluorescence microscope. The expanded laser beams focused through the objective onto the sample are most intense in the middle and the intensity is much weaker at the edges. This causes several problems. First, the background is uneven across the image. Second, and related, integrating peaks of equal intensity in the middle vs on the side will result in unequal counts. To partially resolve these issues and make integration more comparable across the image, we correct for the beam profile using a background image with only the global profile and no peaks. The raw image is divided by the background image to essentially upweight the edges and balance out the beam profile. The actual formula used is
\[\frac{\textrm{Image}(x,y) - \textrm{Electronic offset}}{\textrm{Background}(x,y) - \textrm{Electronic offset}}\times \frac{1}{\textrm{Max Pixel Background} - \textrm{Electronic offset}}\]Here the thermal noise of the camera sensor (Electronic offset) is subtracted from both the image and background image. Then the image is divided by the background image. The result is then divided by the max pixel value of the background image, which is also corrected for the thermal noise of the camera. This final step basically normalizes the background image, so the “corrected” intensity is preserved in the original image, but just reweighed. So in the middle you are basically multiplying by 1, which causes no change and at the edges you are multiplying by more than 1.
Typically images should be opened in Fiji using File->Import->Image Sequence. with virtual stack selected. This ensures very large videos are not stored in memory. Given this scenario for opening videos, the Beam Profile Correction command can create a new image sequence saved to a directory specified by the user in the dialog. So as soon as images are processed they are saved. This ensures the memory usage is small during the operation. Once the operation is complete, the new corrected image sequence can be opened as a virtual stack and processing can continue on the stack. Next steps might include the PeakFinder, PeakTracker or MoleculeIntegrator commands. Alternatively, you can correct the open image directly, but in this case you can not work with a virtual stack, the whole video must be in memory. The former is the preferred option.
Inputs
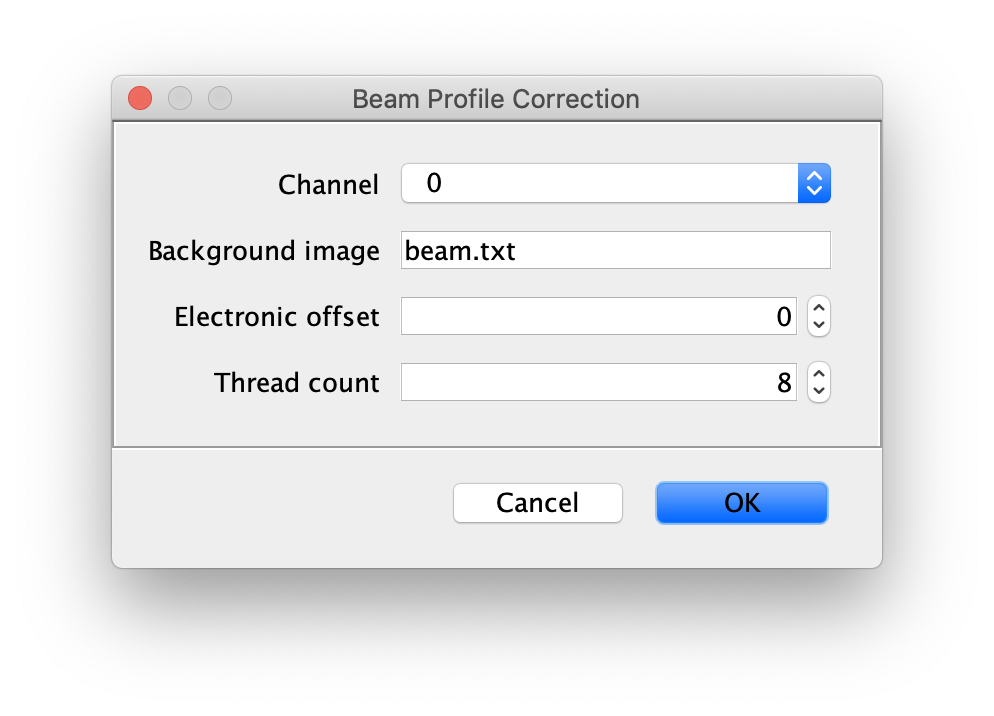
- Image to correct - The Image to apply beam profile correction to, make sure this image is opened and active in Fiji.
- Background Image - This is a single background tif image that should only have the beam profile signal and no peaks. There are several ways to get this image. One way is to go out of focus and collect and image in which there are no single peaks. Another option is to try and generate this from your actual data. Can you do Z project in Image->Stacks with minimum or median for say 50 frames. This will generate a background image. If you still see peaks you can apply a median or minimum filter to the image using Process->Filters with a large radius 3-6. Hopefully this makes a nice background image like the one above in the example with no single peaks (or better than the example). The background image should be active in Fiji.
- Electronic offset - This is the background signal of the camera. So if you completely block all light to the camera for you settings (must be with your exposure and other settings), the mean pixel value is the electronic offset or thermal noise in the sensor. For the moment we don’t have this for most data, so it can be left at 0.
- Thread count - Determines how much computing power of your computer will be devoted to this calculation. A higher thread count decreases computing time.
Output
- Image - A sequence of tif images saved to the directory given. You can then open these as a new virtual stack and continue processing.
I’ve got issues
Ok… so I followed the instructions and my image looks like shit. What happened?
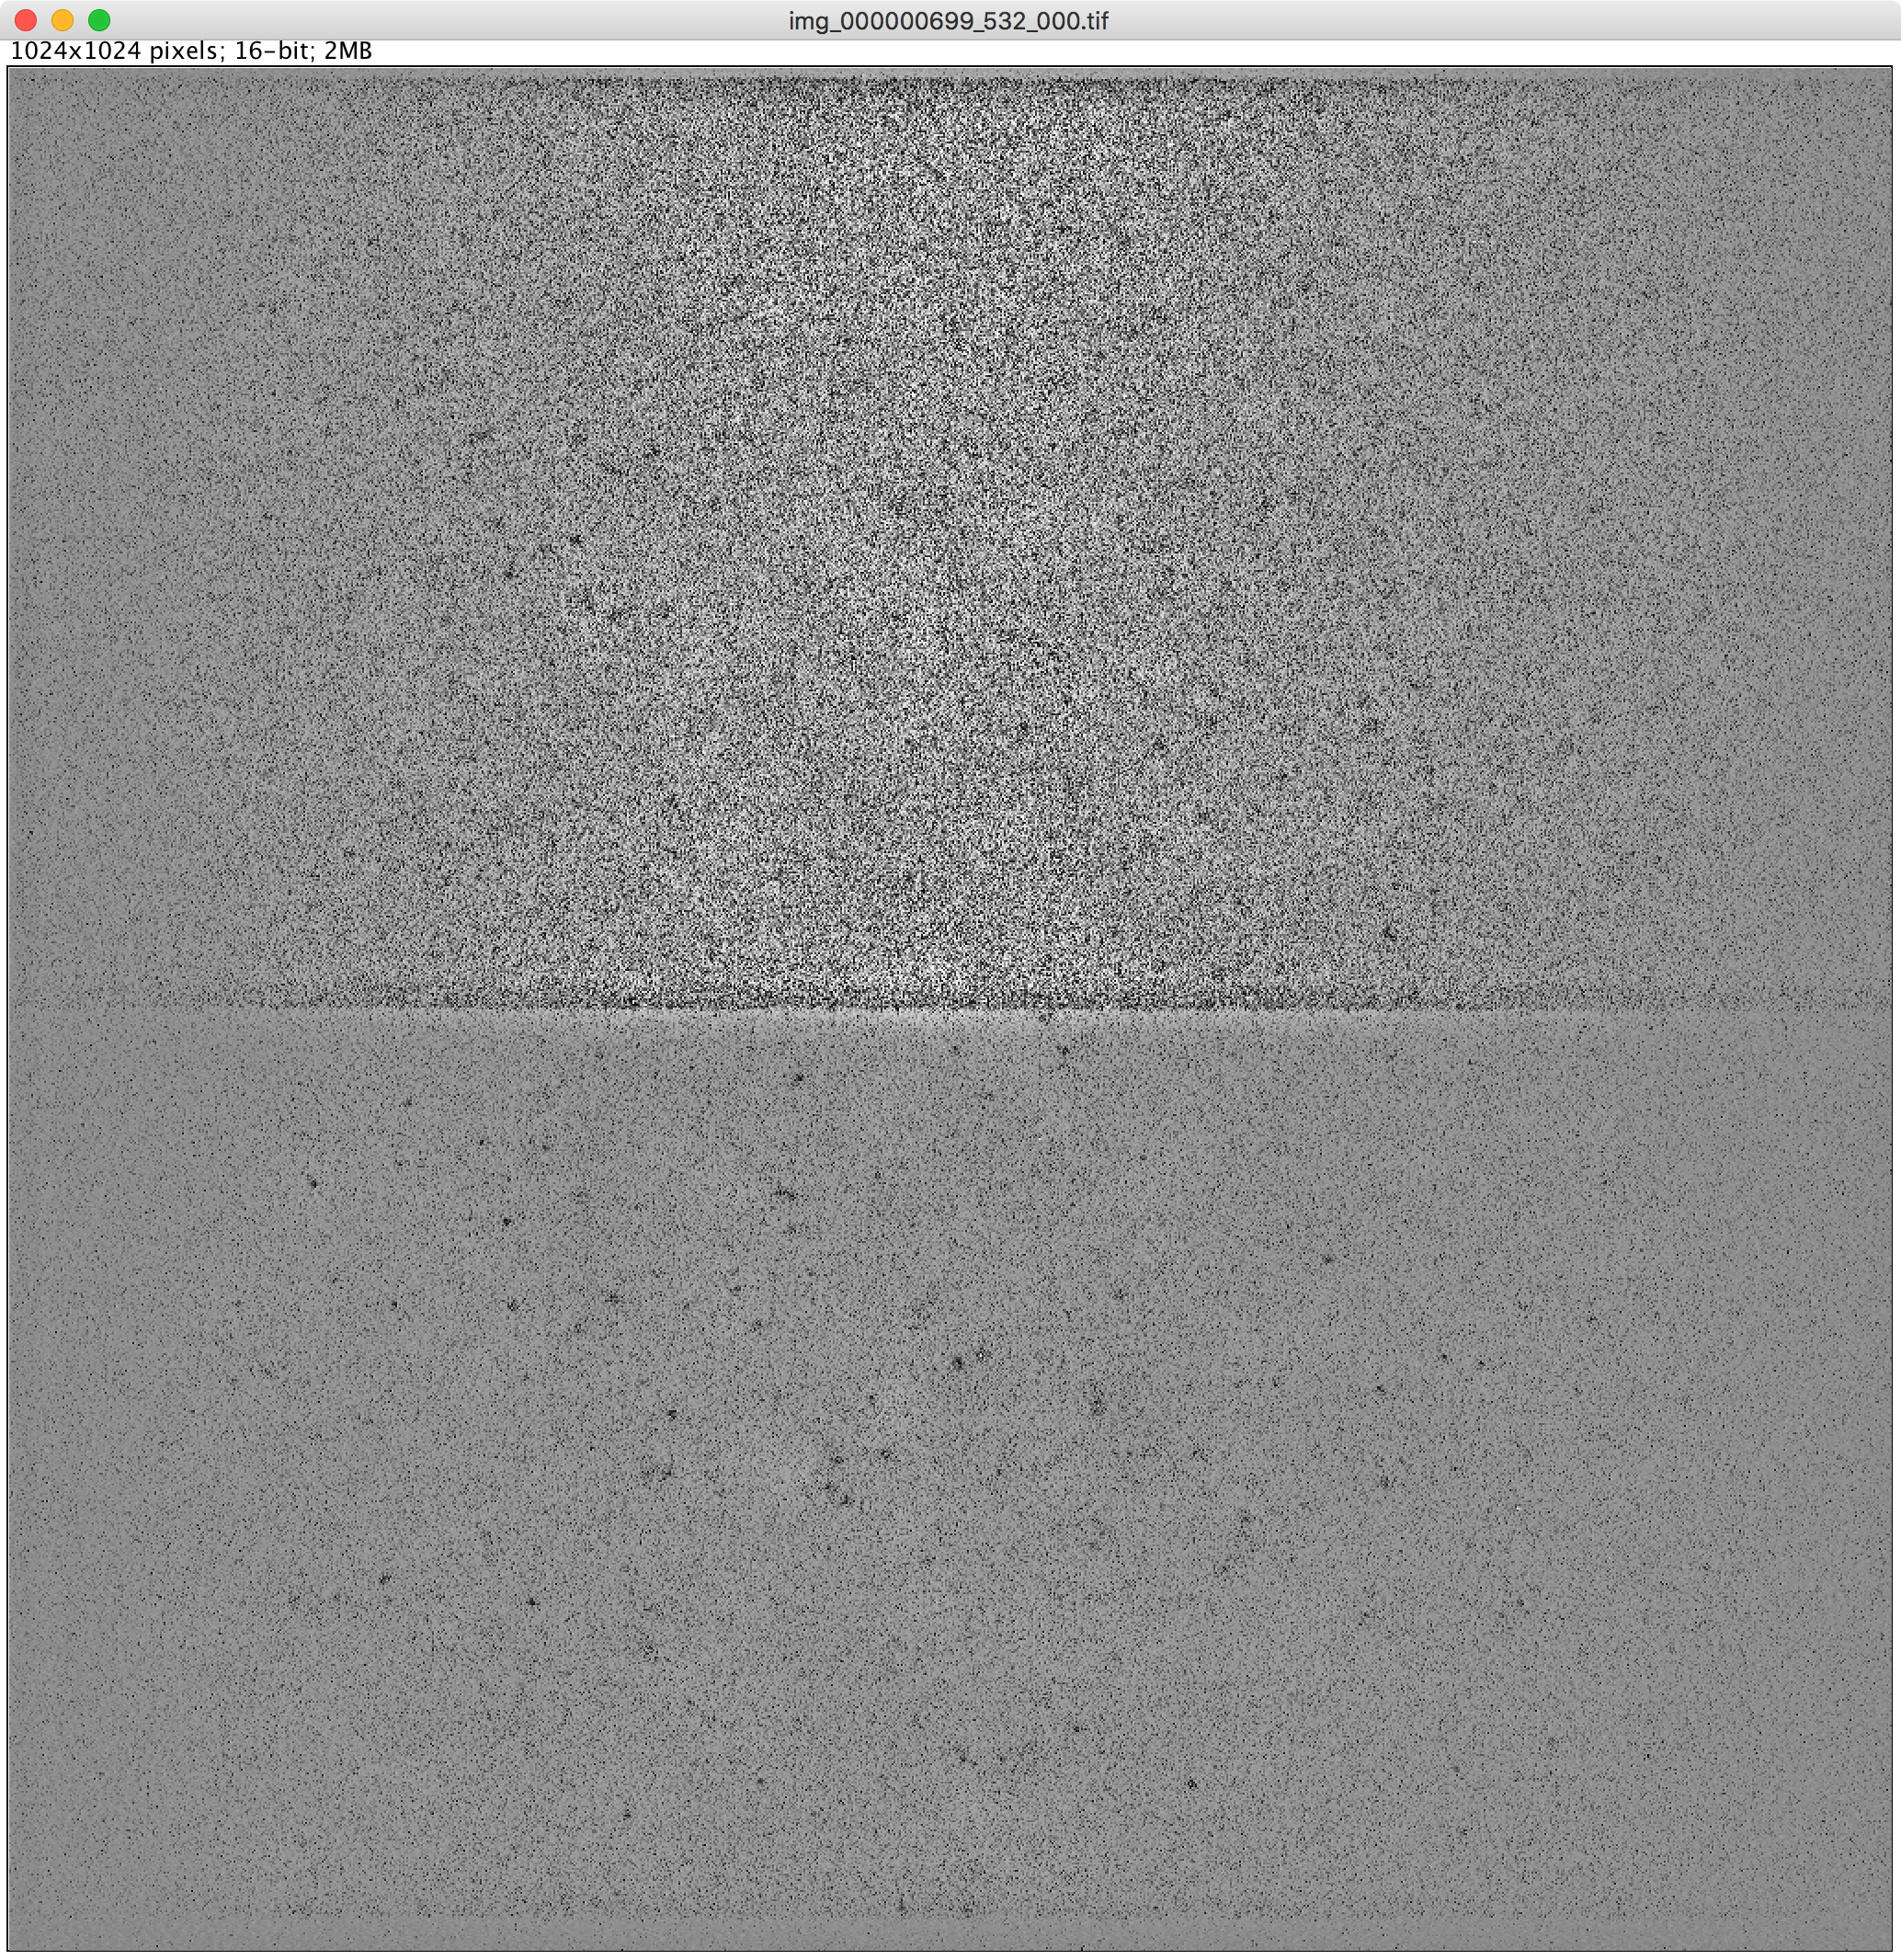
You probably have a bad backgroundImage, so you need to try a different method to create the background image. It is alway better to have a background image with a minimal profile. If the background image has a very strong profile sometimes the image can be overcorrected and you end up with peaks with lower intensity than background. The example above is after auto contrasting. If you have this noise like pattern you need to try a background image with a lower profile. For example, use a larger minimum filter radius so globally the background is lower. And/or ensure it is smooth using a gaussian filter.
How to run this Command from a groovy script
#@ ImagePlus image
#@ ImagePlus backgroundImage
#@ File(label="Select an output directory", style="directory") directory
#@ ImageJ ij

import de.mpg.biochem.mars.ImageProcessing.*

//Make an instance of the Command you want to run...
final BeamProfileCorrectionCommand profileCorrector = new BeamProfileCorrectionCommand();

//Populates @Parameters Services etc.. using the current context
//which we get from the ImageJ input...
profileCorrector.setContext(ij.getContext())

profileCorrector.setImage(image)
profileCorrector.setBackgroundImage(backgroundImage)
profileCorrector.setElectronicOffset(0)

//Run the Command
profileCorrector.run();